How to Grow Mushrooms at Home: A Step-by-Step Guide for Mushroom Enthusiasts
If you’re reading this, kudos to you for thinking about growing your own mushrooms. I hope this blog gives you the confidence to take the next step and get started on your mushroom cultivation journey. This blog is for anyone who wants to learn mushroom cultivation at a hobby level. It has tried and tested cultivation methods to grow mushrooms which are relatively easy for someone who wants to start growing mushrooms at home.
If you don’t have much experience in growing mushrooms, then I recommend you go through our earlier blog on what mushrooms are and another blog with commonly used terminologies in mushroom cultivation.
What are the advantages of mushroom growing?
Why farm mushrooms? As a budding mushroom farmer, you need to be aware of some of the benefits of mushroom cultivation before we get into the details of how mushrooms grow. Here is a list of 6 advantages of farming mushrooms –
- Growing mushrooms is sustainable: Mushroom farming uses agricultural waste such as paddy straw, wheat straw, ragi straw, rice bran, corn cobs, soya hulls etc as input material. By cultivating mushrooms we are able to use a lot of by-products of agriculture and turn them into high-quality nutrition. Whatever waste that is left behind can be added back into the soil or composted, making the process circular.
- Mushroom production is very water efficient: Though mushrooms are 90% water, they only use a fraction of water to grow as compared to traditional crops.
- Mushroom growing doesn’t require soil or sunlight: You don’t need outdoor space to grow your mushrooms and mushroom cultivation can be done indoors in minimal space. This also means that growing mushrooms at home doesn’t depend on soil fertility, pests, or other external factors which are hard to control outdoors.
- Mushroom cultivation is vertically scalable: Mushroom beds or bags can be stacked vertically which means that small-scale mushroom farming can be done even if you only have a small room at home.
- Mushrooms are a high-quality food source: Apart from macronutrients such as protein and fiber, mushrooms contain many unique bioactive molecules that can improve your health and well-being. They are a good source of amino acids, vitamins minerals, and even rare bio-compounds such as Beta Glucans, Terpenes, and Phenolics.
- Cultivation of fungi or mushrooms takes relatively less time: Mushrooms are quite fast-growing when compared to plants. Our pink oyster mushroom is capable of giving you your first harvest in 3 weeks! Compared to traditional food crops you can get more harvests in a year when growing mushrooms which means more income and lower overhead costs per cycle.
If you want to dive deeper into more reasons why you should cultivate mushrooms, please check out the 3 part blog series on why India needs more mushroom farmers: Part1.
What is mushroom cultivation?
Contrary to what most people believe, the most amount of time and effort in growing mushrooms is actually devoted to growing mycelium and not the mushroom itself. Let me give you an example: To grow oyster mushrooms the first 6-8 weeks is actually spent in making spawn and allowing the mycelium to grow and colonize the substrate. The actual fruiting process where you grow mushrooms takes only 7-10 days. Think of this similar to growing fruit trees, most of the effort goes into growing the tree and taking care of it as compared to the actual fruit. Fruit trees usually take 5-10 years to mature and give you the first harvest and the actual fruits take roughly 2-3 months to grow. To get good fruits you need to pay attention to how the trees grow. Similarly, to get good mushrooms, you need to understand and take care of mycelium which then gives you healthy mushrooms under the right conditions.
In short, mushroom cultivation is the process of growing mushroom mycelium, expanding it, feeding it, and then maintaining the right conditions to trigger the growth of mushrooms. Mushrooms are essentially the fruiting bodies of the vegetative mycelium, which exist to spread spores.
How are mushrooms grown?
There are 8 broad steps in mushroom cultivation-
- Mycelium on Agar: A tiny piece of the mushroom tissue is placed on a nutritive medium called agar, in a petri plate. This process is called tissue culturing. Slowly, over the next week or two the mycelium expands and grows over the entire agar surface, “colonizing” it. Here the agar serves two purposes- a 2D surface for the mycelium to expand and also the nutrition for the mycelium to feed on. A fully colonized plate of mushroom mycelium is also called mushroom culture.

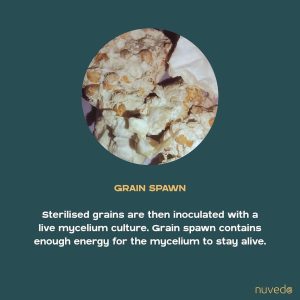
- Spawn production: Once the petri plate is fully colonized by mycelium, a tiny piece of mycelium is transferred to a container filled with half boiled grain or sawdust. The surface of the grain or sawdust provides more surface area for the mycelium to spread. The water and nutrients inside the grain/sawdust ensure the mycelium stays alive and healthy. Spawn helps the cultivator by providing more points for the mycelium to start growing from compared to a single point. If you want to learn more about spawn and how it is made, please go through our earlier Mushroom Spawn 101 blog. The entire process mentioned in steps 1 & 2 is usually carried out in a lab or clean room. Sterile protocols are followed and all the work happens inside a Laminar Airflow or Biosafety Cabinet. Both these devices provide a smooth stream of HEPA-filtered clean air to work in, lowering the chance of contamination. This is why spawn production and mushroom culture preparation is considered expensive and difficult.
- Prepping the substrate: Any material that you use to grow mushrooms on needs to be prepped beforehand. Prepping can include multiple steps depending on what substrate you choose. For example, if you’re working with paddy or wheat straw, steps include chopping it up into 1-3” pieces and then soaking in water to hydrate it.
- Cleaning of substrate: Any material (substrate) that you intend to grow mushrooms on needs to be cleaned before you use it. This is done to reduce the chances of contamination by killing off competing microorganisms present in the substrate. There are many ways to clean your substrate including steam/heat pasteurization, lime pasteurization, sterilization in an autoclave etc. You need to choose an appropriate method on the basis of your substrate material and resource constraints.
- Inoculation of substrate with spawn: After the substrate has been prepped and cleaned, spawn is added to it. This step needs to be done in a clean space and depending on what mushroom you are growing and the kind of substrate you are working with, you might have to invest in some equipment for the same.
- Incubation of inoculated substrate: During this stage, the mycelium slowly starts growing and spreading across the substrate. Depending on the species this step can take anywhere between 3 weeks to 2 months. The bags are allowed to incubate undisturbed in a designated area where the temperature and light conditions are optimal for the growth of mycelium.
- Fruiting myceliated substrate: Once the bags are fully colonized with mycelium, they are shifted to a location where the conditions are optimal to trigger fruit body production. Specific fruiting conditions are dependent on the mushrooms being cultivated but it generally means maintaining ideal levels of temperature, humidity, light and fresh air.
- Harvesting mature mushrooms: Once the mushrooms start pinning, they grow quickly and reach maturity very soon. The last stage is harvesting the mushroom at the ideal stage of growth. Mushrooms are usually harvested before they drop spores and timely harvest can influence the taste, texture, and shelf life of mushrooms.


How do I get started?
Before you begin your journey of growing mushrooms at home, you need to think about a very important question- Which mushroom am I going to grow?
Let’s look at this question in a little more detail-
Deciding which mushroom you will grow is a really critical decision in mushroom cultivation, if not the most important one. Your choice of mushroom will have an effect on-
- Growing conditions: The mushroom you choose should be suitable to grow well given your local weather conditions. If you want to grow exotic mushrooms such as Lion’s mane, you might have to invest in an AC room dedicated to growing them which might turn out to be an expensive affair. Different mushrooms have very specific temperature, humidity, fresh air and light requirements. Please make sure you do a bit of research on the fruiting conditions of your strain before you go deeper into growing it.
- Choice of substrate: Each mushroom has its own preference for what medium it wants to grow on. Most oyster mushrooms tend to do very well on paddy/wheat/ragi straw as compared to mushrooms such as button or portobello which prefer compost-based substrates. One of the major challenges as a home cultivator will be finding a reliable local source for substrate. So, make sure you choose mushrooms which you can grow using locally available materials so that the overall process remains sustainable.
- Choice of substrate cleaning method: Once you have narrowed down on the substrate that you want to use for your mushroom, you will have to choose which method of substrate cleaning will work best for your needs. Substrates which are relatively low in nitrogen such as cardboard and straw can be boiled or even cold pasteurized using hydrated lime. Others such as master’s mix (hardwood sawdust + soy hulls) need to be sterilized using an autoclave at 121 degrees Celsius and 15 PSI pressure.
Please do note that the fruiting temperatures can change depending on the strain for the same species. For example we have seen strains of Shiitake mushroom which can fruit at 24 degrees Celsius and some which fruit only below 16 degrees Celsius

What substrate do I use?
Once you have chosen your mushroom, the next question to address is what material am I going to use as substrate to grow my mushrooms?
When evaluating substrate here are a few things you need to keep in mind:
- Economical: Your substrate material should be affordable. It doesn’t make economic sense to grow your mushrooms using really expensive material as substrate
- Easily Available: Use materials that can be sourced locally or can be procured online with ease.
- Right nutrients: Substrates should have the right ratio of Carbon and Nitrogen to support the growth of mushrooms. Most agricultural waste that are rich in lignin, cellulose and hemicellulose make good substrates but you need to ensure that any material which is very high in nitrogen content is better suited as a supplement and should not be used exclusively as substrate. Example: spent coffee grounds, rice/wheat bran, soy hulls are very high in nitrogen and are best used as an additive to other substrates which are high in carbon such as sawdust, cardboard or straw.
- Hydration capacity: A good substrate should be able to hold 50-70% moisture by weight. This water is what the mycelium will use to grow. A good way to know if a substrate is hydrated to the right amount is by doing a squeeze test- when you squeeze a fist full of hydrated material it should feel wet without the water dripping down in a stream. Different substrates can absorb different amounts of water so ensure you check the hydration capacity of the material before you choose to use it as a substrate.
Here is a simple formula for you to check the hydration% of your substrate:Hydration % = [ [(Wet weight of substrate after hydration) – (Dry weight of substrate before hydration)] ÷ (Wet weight of substrate after hydration) ] × 100 - Aeration: Your substrate should allow airflow so that the mycelium can breathe. Lack of airflow or poor airflow leads to anaerobic conditions which can promote the growth of bacteria leading to contamination. Any substrate can get anaerobic if it gets overhydrated or too compacted while packing it.
- Free from competing organisms: Substrates you use should not have other organisms growing on it as this can lead to competition with mushroom mycelium ultimately resulting in poor or no yields. This happens because the mycelium ends up spending all its energy on defending itself against competition rather than producing mushrooms.

If you’re new to mushroom cultivation, we recommend using hardwood fuel pellets as substrate to begin with. These are sawdust which has been heat treated and extruded into the shape of pellets. They come pre-pasteurized and therefore the chances of contamination while using them are very low compared to sawdust procured from mills or even straw. We have sawdust substrate pellets available on our website for home use.
What method of substrate cleaning should I use?
Now that you have an idea of what substrate you will be using, the next thing that you need to decide is how you’re going to clean your substrate. There are plenty of ways to do this depending on your scale and budget. I will list down the 6 most common ways and how to perform them.
- Steam Pasteurization:
Suitable substrates: Straw, sawdust, cardboard, agri-waste such as shredded banana leaves, bamboo leaves time taken: 2-8 Hours- Pass steam generated in a boiler to a chamber with hydrated substrate.
- Continue to pass steam and ensure the temperature is maintained at 60-65⁰ C for 4 hours or at 80-85⁰ C for 2 hours for straw or other agri-waste. In case you are using sawdust, you will need to pasteurize for 6-8 hours at 80-85⁰ C.
- Allow bags to cool overnight before inoculation.
- Hot Water Pasteurization
Suitable substrates: Straw, cardboard, agri-waste such as shredded banana leaves, bamboo leaves etc. Time taken: 2 Hours- Plunge dry/hydrated substrate placed in a sack for 2 hours in hot water maintained at 80-85⁰ C for 2 hours.
- Remove the sack and allow it to cool and release excess water.
- Note that the same water can be used 2 times, after which it needs to be discarded.
- If you’re using cardboard, a quick dip in hot water at 80-85⁰ C should suffice.
- Lime Pasteurization
Suitable substrates: Straw, cardboard, agri-waste such as shredded banana leaves, bamboo leaves etc Time taken: 12-20 Hours- Add hydrated lime (Ca[OH]₂) at a rate of around 2-2.5 g / Litre of water to 20 L
- 1.5 Kg of straw is then bagged in a sack and submerged in this water for 12-20 hours. (Keep a heavy object to make sure straw stays submerged)
- After soaking, the straw is drained well to remove excess water and then inoculated as normal.
- Excess lime water can be used for subsequent treatment batches, just be sure to add more lime as needed to maintain the proper pH (12-13).
- Cold Fermentation
Suitable substrates: Straw Time taken: 7-14 days- Submerge the straw in a drum filled with water for 7-14 days.
- The substrate will smell somewhat foul and the water surface will be covered in a thin layer of slime. This is good; it means that the fermentation was successful.
- The substrate is then removed and suspended above the fermentation tank to drain until water stops dripping from the substrate.
- Ash Pasteurization
Suitable substrates: Straw, wood ash, cardboard, agri-waste such as shredded banana leaves, bamboo leaves etc. Time taken: 12-20 Hours- Add Wood Ash at a rate of around 20g / Litre of water to 20L.
- Use a PH strip to ensure the PH is more than 10. If it is lower, add more ash.
- 1.6 Kg of straw is then bagged in a sack and submerged in this water for 12-20 hours. (Keep a heavy object to make sure straw stays submerged)
- After soaking, the straw is drained well and then inoculated as normal.
- Autoclave/Pressure Cooker Sterilization
Suitable substrates: ALL- hydrated substrates. Time taken: 30 – 180 Minutes (30 minutes for straw, 2-3 hours for nutrified sawdust)- Put enough water in the bottom of the PC so that by the end of the pressure cooking there is still some water left at the bottom of the PC. For most runs, 0.5 inches (1.25 cm) of water is sufficient. Never run the pressure cooker dry!
- Place your materials in the PC and securely close the lid. If using a “rocker top” pressure release system, leave the weight off the vent port. If using a “petcock” pressure release, open the petcock. Turn the heat source to a level that requires 15 minutes to pass before steam begins to flow from the petcock or vent port. Heating the PC too rapidly can cause substrate bags to break.
- Allow a steady jet of steam to escape from the pressure release vent for 1-5 minutes and then place the weight on the vent port or close the petcock. This ensures that everything heats evenly. The PC will quickly come up to pressure in 5-15 minutes. Once the desired pressure is reached (typically 15 psi), reduce the heat level on the burner until the pressure stabilizes. It may take a few minutes to adjust the heat to get it just right. If using a “rocker top;’ adjust the heat source so that the rocker maintains a slow, steady rocking motion and/or jiggles once a minute or so.
- Once the pressure is stabilized, start your timer. You will need to sit with the pressure cooker during the entire run to make sure the pressure remains constant and to adjust the heat accordingly. Cook your materials for the specified run time. If you are above 2000 feet (6000 m) in elevation you will need to add 5% to the cooking time for every 1,000 feet (300 m) (i.e. at 3,000 feet [900 m] add 5%, 4,000 feet (1,200 m] at 10%, etc.).
- When the run time is over, turn off the heat source and walk away to let the PC cool and de-pressurize on its own. I do much of my PC work at night so that everything is cooled by the following morning.

Figure 2: Autoclave of 20L capacity


Choosing between sterilization and pasteurization:
Both sterilization and pasteurization have pros and cons, as a cultivator you will have to choose one of the methods based on your constraints and requirements. Here are some fundamental differences between both approaches:


5 Really easy ways to grow mushrooms at home
Here are 5 of the easiest and simplest ways to grow mushrooms at home. Please note that most of these methods are geared towards the cultivation of Oyster mushrooms as they are really aggressive and less prone to contamination. If you want to learn how to grow mushrooms like shiitake and lion’s mane you will need to use an autoclave or steam sterilizer. They also need to be inoculated under sterile conditions using a Laminar Air Flow or a Still Air Box.
There are many other ways to cultivate mushrooms out there but I find these 5 methods to be the simplest-
Method 1: Use a mushroom-growing kit
This is the easiest way to grow mushrooms. The best part about growing kits is that they come pre-inoculated with spawn and fully colonized. You can proceed to grow mushrooms from day one without waiting. There are many advantages in starting your home cultivation of mushrooms using growing kits-
- No risk of contamination: As the kits come pre-inoculated and colonized, the risk of contamination is eliminated.
- Saves time: The kit is ready to use from day 1 and you can save a lot of time (2-6 weeks) that would have otherwise gone into prep and incubation.
- Very convenient: The kits usually come with all materials and instructions included which means that you don’t need to spend time or effort in procuring any extra materials.
- Customer support: At Nuvedo we ensure that we help each and every one of our customers in their mushroom-growing journey. We have a support team who will help you troubleshoot and answer any queries you may have while you grow your mushrooms. Before you get started make sure you select the mushroom which is best suited for your location. At Nuvedo We offer many different kits for home use including white, pink, and golden oyster mushrooms and even Lion’s mane. If you’re unsure which kit is suitable for your location please use this widget and enter the temperature and humidity at your location, the widget will then suggest the best kits for your location. What you need: Any fully colonized mushroom growing kit with a species of mushroom suitable for your location.
Time taken: 5 minutesInstructions:- Find a good location to place your kit. Make sure it is clean, free from pests, has ambient lighting and enough fresh air.
- Cut a small 2-3 inch ‘X’ mark on the plastic cover.
- Mist with drinking water regularly (Make sure you don’t spray directly on the mushrooms themselves)
- Watch your mushrooms grow!
- Harvest the mushrooms when they’re ready!
|
|
|
|


Method 2: Bucket Tek using straw
This technique is quite popular with both home growers and commercial cultivators and also eco-friendly since you avoid using single-use plastic completely. Here you use a reusable food-grade plastic bucket or container to house your substrate while the mycelium feeds on it. We will be using the lime pasteurization method to clean your substrate. Please note that this method of cultivation is best suited for oyster mushrooms.
What you need: 10L Paint bucket or food grade plastic container (PP5 is a really good plastic to use), 900g-1Kg straw, low magnesium hydrated lime powder or NuvoPast, scissors, micropore tape, isopropyl alcohol or any disinfectant of your choice. Our DIY Mushroom Growing Kit comes with most of the materials mentioned above including an information pamphlet and YouTube video which explains the entire process.
Time taken: 90-120 minutes
Instructions:
STEP 1: Cleaning and hydrating your substrate.
- Put 1 Kg chopped straw into a meshed bag / cloth bag / pillow case
- Fill a 20 liter bucket with water, leaving 2-3 inches gap from the top of the bucket
- Using a weighing scale, measure 25-30 grams of hydrated lime powder
- Mix the powder into the water thoroughly
- Put the substrate-filled bag into the bucket and place a heavy object on top to make sure that all of your substrate is submerged under water
- Leave the substrate bag submerged for 12-20 hours


STEP 2: Preparing the bucket
- Make 3-5 x 8mm diameter holes on the bucket as shown below. These holes are where the mushrooms will grow from
- Make 4 x 3mm holes at the bottom. This is for excess water to drain out of the substrate
- Clean the bucket and lid thoroughly with isopropyl alcohol or soap solution
- Tape all holes on the side wall of the bucket (not the holes below), with 2 layers of micropore tape. This is to ensure that no contaminants enter the bucket through these holes.

Figure 13: Diameter and number of holes to be made


STEP 3: Inoculation
- Remove the bag with substrate from the bucket
- Squeeze the bag to remove excess water
- Take a fistful of substrate and squeeze it. The straw should feel wet without any water dripping out of it. If the straw feels wet, it needs to be dried more before use
- Take the sanitized bucket and pack the bottom with a 5-6 cm thick layer of substrate
- Using the spawn packet provided, make an even thin layer of spawn above the substrate layer
- Alternate with layers of substrate and spawn and top off the bucket with a final layer of substrate
- Pack everything in and close the lid.

Your mushroom growing bucket is now ready for incubation!
STEP 4: Incubation
Leave your bucket in a cool, dry and hygienic place away from direct sunlight, for a period of 2-3 weeks. The mycelium slowly grows on the substrate and breaks it down to feed itself, over the next few weeks.
STEP 5: Inspection & Fruiting
- After the 3 week mark, open the bucket lid. The inside should be almost completely covered in white mycelium.
- If you can still see straw which has not been colonized, close the bucket and check it after a few days
- If you notice any discoloration such as green, blue or pink, this means that your substrate has been contaminated. You will have to empty the bucket, clean thoroughly and start again
- Once your substrate has been completely colonized, open the micropore tape. This increases the airflow, triggering the mycelium to produce pins
- Spray the bucket with clean drinking water 2-3 times daily
- Watch the mushrooms grow!
- Harvest them at the right time to enjoy your first flush of oyster mushrooms!

Figure 16: What your substrate should look like after 3 weeks


Method 3: Using hot water pasteurized sawdust pellets
In my opinion, this has to be the easiest and most foolproof way to grow mushrooms at home. You can use this method to grow all varieties of oysters and even some hardy medicinal varieties such as Reishi and Turkey tail (since they are aggressive colonizers). Other mushrooms such as shiitake, lion’s mane, enoki, etc can be grown on plain sawdust pellets but they need additional supplements such as soy hulls. Nutrified sawdust needs to be autoclaved to sterilize it well and they can only be inoculated inside a Laminar Air Flow or a Still Air Box which makes them hard to grow for beginners.
What you need: PP5 bag with breathable filter, 1 kg sawdust pellet, hot water, scissors, isopropyl alcohol or any disinfectant of your choice, and tape. We have a DIY Mushroom Cultivation Kit which comes with all the inputs you need including a detailed instruction pamphlet that describes the process in depth!
Time taken: 6-7 hours
STEP 1: Pasteurizing the substrate
- Add EXACTLY 1.5 Liters of boiling hot water inside the filter patch bag containing 1 Kg substrate pellets. This helps in pasteurizing and hydrating the substrate pellets
- Fold the top of the bag and tape it down with a piece of cello tape.
- Wait for 5-6 hours while the bag cools down to room temperature.
|
|
|


STEP 2: Inoculation with grain spawn
- Sanitize your hands, scissors and work space with soap water/Iso propyl alcohol or any other disinfectant
- Break up the spawn inside the packet and then cut open the packet using your scissors
- Remove the tape on the cooled bag of substrate and add the spawn into it
- Fold the top of the bag over itself and tape it shut using cello tape. Ensure that no air can enter or leave the bag as it can lead to contamination
- Mix the spawn into the substrate from outside the bag using your hands
|
|
|


STEP 3: Incubation
- Move the bag to a cool, clean area away from direct sunlight and let it incubate for 15-21 days.
STEP 4: Fruiting
- Once the mycelium has completely colonized the bag, you can proceed to cut an X mark on the bag using a sharp knife or a blade.
- Spray clean, drinking water using the spray bottle provided on the plastic thrice a day
- Once the mushroom pins emerge, let them grow till they reach maximum size. Twist and pull gently to harvest!

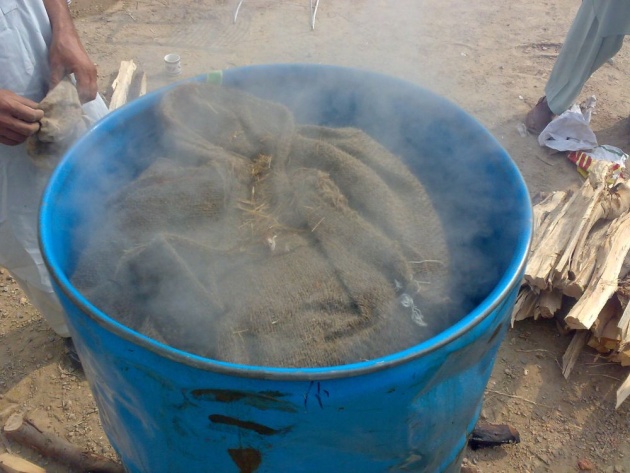
Method 4: Hot water pasteurized straw in plastic bags
This method is the most commonly used method to cultivate mushrooms in India. Most mushroom farms in India who grow Oyster mushrooms tend to boil their straw in order to pasteurize it. This is a fairly simple method but the only downside is that you need to have a heat source and a container large enough to fit 1kg of chopped straw.
What you need: Plastic bag (preferably food grade) , 1Kg straw, scissors, micropore tape, isopropyl alcohol or any disinfectant of your choice, stove/induction cooker, needle or safety pin
Time taken: 2-3 hours
Instructions:
STEP 1: Cleaning and hydrating your substrate.
- Put 1 Kg chopped straw into a meshed bag / cloth bag / pillow case
- Fill a 20 liter metallic vessel with water, leaving 2-3 inches gap from the top of the bucket
- Put the substrate filled bag into the bucket and place a heavy object on top to make sure that all of your substrate is submerged under water
- Turn on the stove/hotplate and put it on high heat to bring the water to a boil
- Reduce the heat so that the temperature is maintained above 80 degrees
- Leave the substrate bag submerged for 2 hours
|
|
|


Image- https://cdn.bitlanders.com/users/galleries/315133/315133_gallery_551542dd62ea2_jpg_fa_rszd.jpg
STEP 2: Inoculation
- Remove the bag with substrate from the bucket and let it dry for 1-2 hours in a clean area.
- Squeeze the bag to remove excess water
- Take a fistful of substrate and squeeze it. The straw should feel wet without any water dripping out of it. If the straw feels wet, it needs to be dried more before use
- If the spawn is clumped up, break it up into smaller pieces from the outside
- Take the plastic bag and pack the bottom with a 5-6 cm thick layer of substrate
- Use the crumbled spawn packet provided, make an even thin layer of spawn above the substrate layer
- Alternate with layers of substrate and spawn and top off the bag with a final layer of substrate
- Pack everything in and seal the top by folding it and taping it shut
- Using a small needle, poke 15-20 tiny holes around the bag (for best results we recommend you use a filter patch bag and heat seal it to prevent any contamination but for home cultivation of oyster mushrooms the technique mentioned above will work)
Your mushroom growing bag is now ready for incubation!

STEP 4: Incubation
Leave your bag in a cool, dry and hygienic place away from direct sunlight, for a period of 2-3 weeks. The mycelium slowly grows on the substrate and breaks it down to feed itself, over the next few weeks.
|
|
|


STEP 5: Inspection & Fruiting
- After the 3-week mark, check the bag. The entire bag should be covered with white mycelium
- If you can still see large patches of straw which has not been colonized, let it incubate undisturbed for a few more days.
- If you notice any discoloration such as green, blue, or pink, this means that your substrate has been contaminated. You will have to discard the bag and start again
- Once your substrate has been completely colonized, use a pair of clean and santised scissors (Use soap water or Isopropyl alcohol to clean the blades) to cut open an X-shaped slit on the bag. This increases the airflow, triggering the mycelium to produce pins
- Spray the bag with clean drinking water 2-3 times daily
- Watch the mushrooms grow!
Harvest them at the right time to enjoy your first flush of oyster mushrooms!
|
|
|


Method 5: Lime pasteurized sawdust pellets
This is another method of mushroom cultivation that makes use of sawdust pellets and is the same as hot pasteurization of sawdust pellets apart from one difference. The difference here is that you will be using hydrated lime powder to pasteurize your substrate instead of boiling hot water. This method doesn’t need any heating and can be done very easily at home. This is different from Bucket Tek since you don’t need to spend much time soaking or drying the substrate. The waiting time is much less- 3 hours compared to 6 hours of hot pasteurization and 12 hours of lime pasteurized straw in buckets.
What you need: PP5 bag with breathable filter, 1Kg sawdust pellets, low magnesium hydrated lime powder OR NuvoPast, scissors, isopropyl alcohol or any disinfectant of your choice, tape
Time taken: 90-120 minutes
STEP 1: Pasteurizing the substrate
- Add 2 heaped tablespoons of Pasteurization powder into EXACTLY 1.5 Liters of drinking water and mix well. Add this water to the filter patch bag containing 1 Kg substrate pellets.
- Fold the top of the bag and tape it down with a piece of cello tape.
- Wait for 3 hours for the pellets to get hydrated and then mix the pellets and water mixture by applying pressure on the outside of the bag using your hands.
STEP 2: Inoculation with grain spawn
- Sanitize your hands, scissors and work space with soap water/Isopropyl alcohol or any other disinfectant
- Break up the spawn inside the packet and then cut open the packet using your scissors
- Remove the tape on the cooled bag of substrate and add the spawn into it
- Fold the top of the bag over itself and tape it shut using cello tape. Ensure that no air can enter or leave the bag as it can lead to contamination
- Mix the spawn into the substrate from outside the bag using your hands
- Move the bag to a cool, clean area away from direct sunlight and let it incubate for 15-21 days
STEP 3: Incubation
- Once the mycelium has completely colonized the bag, you can proceed to cut an X mark on the bag using a sharp knife or a blade.
STEP 4: Fruiting
- Spray clean, drinking water using the spray bottle provided on the plastic thrice a day
- Once the mushroom pins emerge, let them grow till they reach maximum size. Twist and pull gently to harvest!
What is the best way to fruit mushrooms?
Once you’re done with incubating your substrate bags, the next obvious question is how do I go about fruiting it? Well, each mushroom species has a specific fruiting condition in which it does best so it is important to ask your spawn vendor what the right conditions are for the strain they have provided.
Fruiting conditions mean 4 parameters- Temperature, Humidity, CO2 levels and Light levels.
The fruiting room should be clean and hygienic to start with. The room should have ample ventilation to ensure fresh air exchange. There should be enough light in the room- a window that allows sunlight during the day or even a lightbulb will do. Make sure the bulb doesn’t make the room too hot (unless you live in a place where temperatures are very low). As for the humidity, most mushrooms thrive in RH of >80% but anything above 60% will do. If you live in a really dry area you can try one of these hacks or you can consider investing in a small humidifier. Temperatures are hard to control without an Air Handling Unit or AC so please make sure you’re growing mushrooms that are suitable for your local microclimate. Please note that ACs tend to de-humidify the room, so in case you are using one make sure the humidifier is not directly in line with the flow of air from the AC!
All the conditions mentioned above become critical when you’re cultivating mushrooms for commercial use at a slightly bigger scale. As a home user, you can get away with using a humidity tent or wrapping a wet towel around the base of the kit.

In closing, thank you for taking this journey through the world of mushroom cultivation with me. Your curiosity and interest have already set you on the path to a rewarding and exciting venture. Remember, as with any new endeavor, you might encounter challenges along the way, but rest assured, the satisfaction and joy derived from growing your own mushrooms will far outweigh any obstacles.
Should you find yourself with questions or seeking further clarification on any aspects of this guide, please don’t hesitate to comment below. Your insights, experiences, and queries enrich our community of mushroom enthusiasts and may very well inspire my next blog post.
Always keep in mind that mushroom cultivation, like any horticultural activity, is as much an art as it is a science. There isn’t a ‘one-size-fits-all’ approach, so I urge you to experiment and discover the methods and techniques that resonate best with your own unique situation. This blog is simply a stepping stone, a launchpad to your personal adventure in the realm of fungi.
Lastly, remember that the journey is just as important, if not more so, than the destination. Stay motivated, stay curious, and most importantly, enjoy every moment of the process. This journey of mushroom cultivation promises a world of discovery and I’m excited to hear about your triumphs and learnings along the way.
May your home teem with bountiful fungi and your spirit be enriched by the process. Happy mushrooming!
About the author
 Jashid is the co-founder of Nuvedo. An IIM graduate, with a bachelors in manufacturing engineering from BITS Pilani, his interest with fungi and mushrooms started with looking for alternate sources of vegetarian protein. He loves talking about mushrooms, spending time with them and studying their behavior in all shapes and forms. The role of fungi in the natural ecosystem, with mushrooms being at the forefront, led him to explore their structures, benefits and cultivation. Bringing his experience in retail and sustainability together, through a lens of permaculture, he cofounded Nuvedo with the aim of bringing legitimate, gourmet, and medicinal mushrooms to Indian people. He is committed towards spreading the nutritive and therapeutic properties of mushrooms while building an ecosystem of trust with the community. His love for people and passion for mushrooms has evoked the birth of this organization.
2 thoughts on “How to Grow Mushrooms at Home: A Step-by-Step Guide for Mushroom Enthusiasts”
Leave a Reply
You must be logged in to post a comment.


This is one of most comprehensive how to on cultivating mushrooms! Thanks for writing this. I know I am going to come back to this page often!
Thank you so much for your positive feedback! We’re glad that you find the blog useful.